
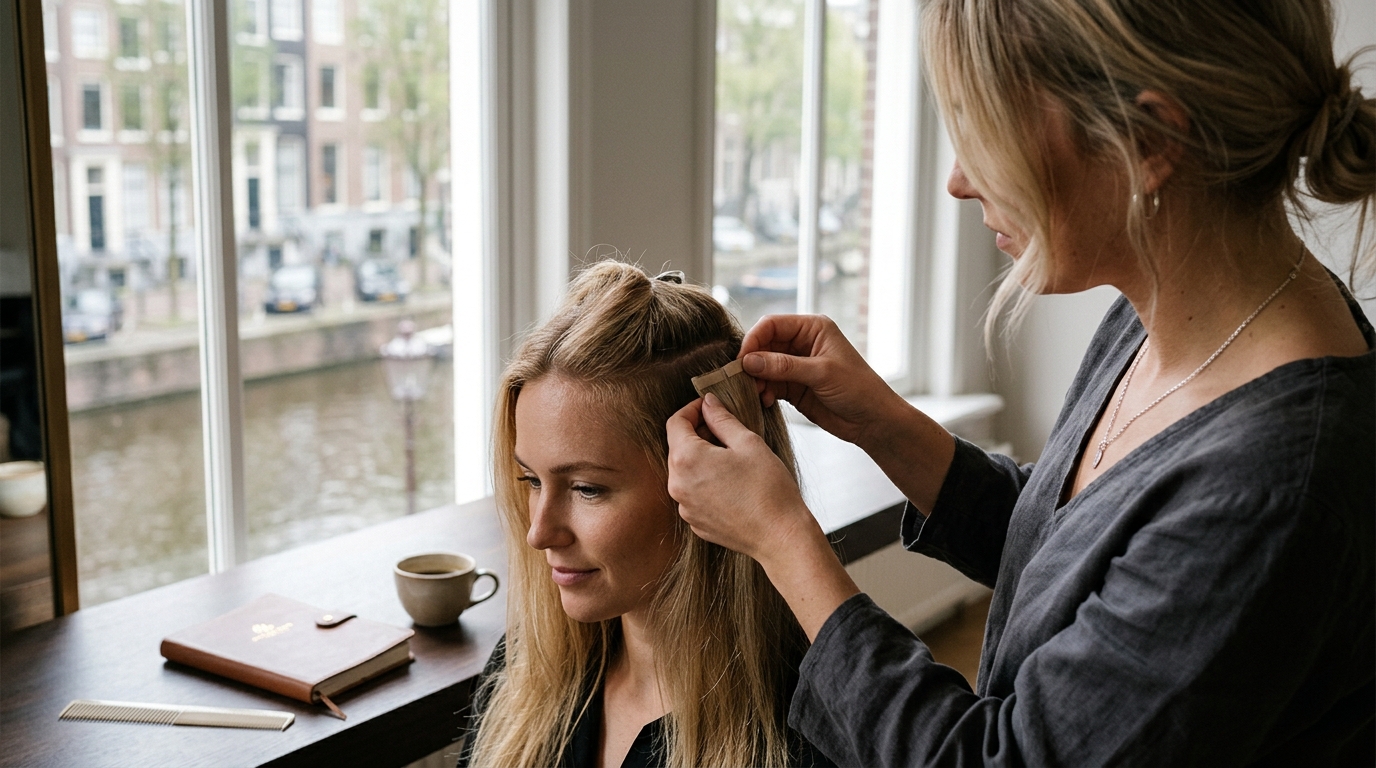
Fine hair presents a unique challenge for volume enhancement because each strand has a smaller diameter and less structural integrity than coarse hair. According to recent dermatological studies on hair density, approximately 40% of women experience some form of hair thinning or fine texture that makes traditional heavy extensions difficult to wear. This statistic highlights why the right installation method is critical for maintaining hair health while achieving the desired aesthetic. Tape-in extensions have emerged as a leading solution for this demographic because their flat, lightweight design distributes weight evenly across the natural hair shaft. This guide provides a comprehensive, professional-grade walkthrough for installing tape-in extensions on fine hair, ensuring a secure hold without causing traction alopecia or breakage. (Contact page of Hair)
Preparation and Hair Assessment
Before applying any extensions, it is vital to understand the structural limitations of fine hair. Fine hair is defined by its small diameter, which makes it more susceptible to damage from heavy weights and improper adhesive application. The first step in the process is a thorough consultation to determine the correct weight and length of the extensions. For fine hair, lighter wefts are essential to prevent stress on the natural hair follicles.
Ensure your hair is completely clean and free of any product buildup. Residue from shampoos or conditioners can interfere with the medical-grade adhesive used in high-quality tape-ins. At Hair Extensions Europe, we recommend using a clarifying shampoo to prepare the hair base. This ensures that the tape bonds directly to the hair shaft rather than to leftover oils or silicones. A clean canvas is the foundation of a long-lasting and safe installation.
Essential Tools and Products
Successful installation requires precision tools and the right products. Using the wrong materials can lead to slippage or damage. The following list outlines the necessary items for a professional result:
- Sectioning Clips: To keep the working area clear and organized.
- Tail Comb: For creating precise, horizontal sections of hair.
- Tape-In Remover Solution: Specifically formulated to dissolve adhesive without harming natural hair.
- Heat Protector Spray: To shield fine hair from thermal damage during styling.
- High-Quality Tape-In Wefts: 100% human hair extensions with strong, medical-grade adhesive.
Investing in premium tape-in extensions is crucial for fine hair. Lower-quality tapes may use weaker adhesives that fail quickly, requiring more frequent adjustments and increasing the risk of hair loss. Explore our Tape-In Extensions collection to find the perfect match for your texture and color.
Step-by-Step Installation Process
The installation of tape-in extensions on fine hair requires a delicate touch and a strategic approach. The goal is to sandwich the natural hair between two tape tabs without applying excessive tension. Follow these steps carefully to ensure a secure and comfortable fit.
Step 1: Sectioning the Hair
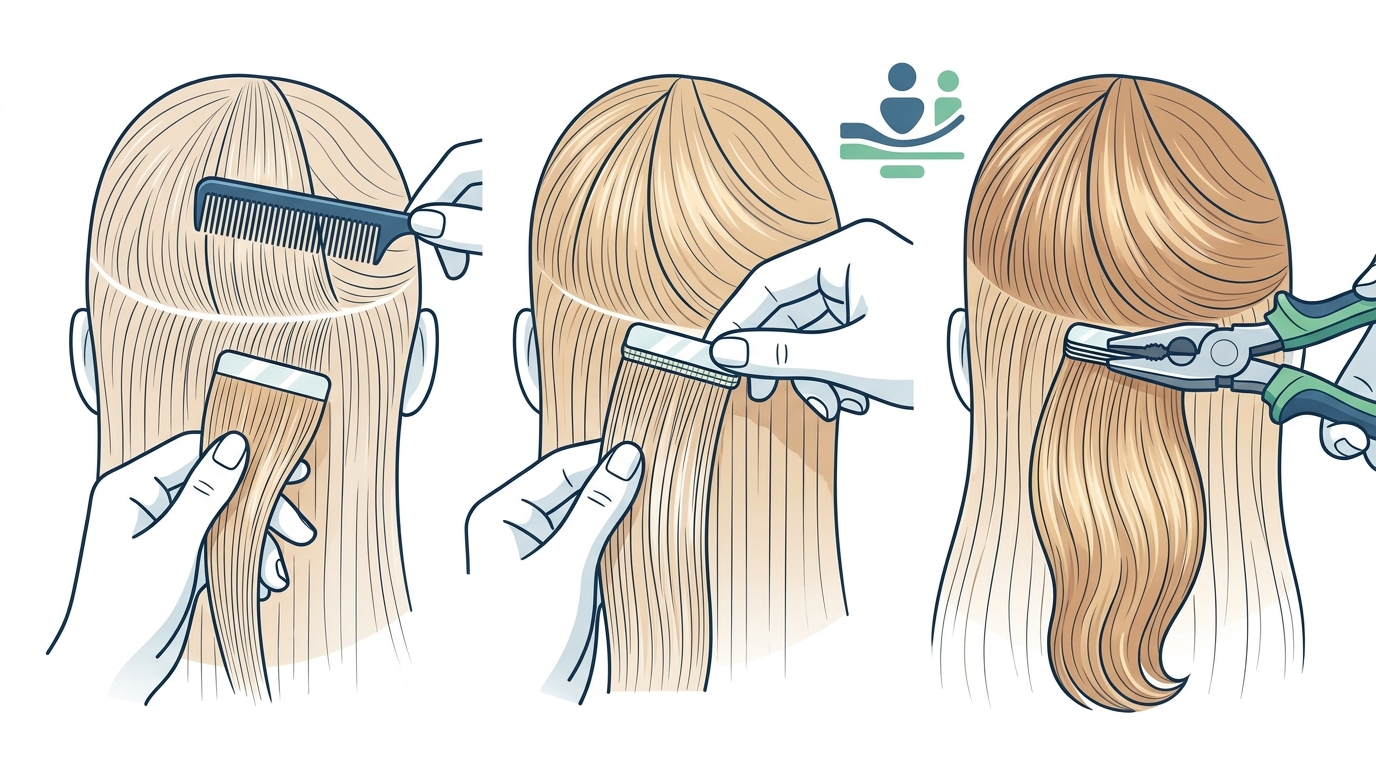
Begin by parting your hair horizontally at the nape of your neck. Create a thin, horizontal section that is no thicker than the width of the tape-in weft. This thinness is critical for fine hair because thicker sections can cause the tape to slip or feel bulky. Secure the rest of your hair with clips to keep it out of the way. Work your way up the head, creating horizontal rows from the nape to the crown.
Step 2: Applying the First Tape-In
Take one tape-in weft and place it against the root of the sectioned hair, about half an inch away from the scalp. The tape should lie flat against the head. Next, take a second tape-in weft and place it on the opposite side of the natural hair section, sandwiching the natural hair between the two adhesive tabs. Press firmly together to activate the bond. Ensure that the natural hair is centered within the tape to prevent uneven weight distribution.
Step 3: Continuing the Pattern
Move up to the next horizontal section. Place the next row of tape-ins slightly higher than the previous row, ensuring that the tapes do not overlap. Overlapping tapes can create lumps and cause discomfort. For fine hair, it is often recommended to use fewer wefts than for thick hair to maintain a natural look and reduce weight. Consult our Color Matching Guide to ensure your extensions blend seamlessly with your natural hair.
Step 4: Finalizing the Installation
Once all rows are installed, check the tension and placement. The tapes should lie flat against the head with no gaps. Gently tug on each tape to ensure it is secure. If any tape feels loose, re-apply it with more pressure. Avoid applying heat directly to the tapes during installation, as this can weaken the adhesive before it has fully set.
Blending and Styling Techniques
After installation, blending is key to achieving a natural appearance. Fine hair can sometimes look flat, so adding volume at the roots is essential. Use a round brush and a blow dryer to lift the roots at the tape sites. This helps the tapes lay flat and disappear into the natural hair. Avoid brushing the tapes directly, as this can cause tangling. Instead, brush from the ends up to the tapes gently.
When styling, use heat protectant spray before using any hot tools. Fine hair is more prone to heat damage, so keeping the temperature moderate is important. You can curl or straighten your hair as desired, but avoid wrapping the hair tightly around the tape tabs. This can cause the adhesive to loosen over time. For more tips on maintaining your extensions, visit our Hair Care section.
Maintenance and Aftercare
Proper maintenance extends the life of your tape-in extensions and protects your natural hair. Fine hair requires extra care to prevent slippage and breakage. Follow these guidelines to keep your extensions looking fresh and healthy.
Washing and Drying
Wash your hair in a downward motion, avoiding scrubbing the roots vigorously. Use sulfate-free shampoos and conditioners to prevent the adhesive from breaking down. When drying, pat the tapes dry with a towel and allow them to air dry as much as possible. If using a blow dryer, keep it on a cool setting and avoid directing the heat directly onto the tapes.
Brushing and Detangling
Brush your hair at least twice a day to prevent tangling. Start from the ends and work your way up to the roots. Use a loop brush or a soft bristle brush designed for extensions. Never pull through knots with force, as this can dislodge the tapes. If you encounter a tangle near the tapes, hold the hair above the tape to prevent pulling on the adhesive.
Professional Adjustments
As your natural hair grows, the tapes will move away from the scalp. For fine hair, it is recommended to have your tapes moved up every 6 to 8 weeks. Delaying adjustments can lead to tangling and matting near the roots. Contact our Customer Service team to schedule your next adjustment or to purchase the necessary removal and reapplication products.
Choosing the Right Tape-In for Fine Hair
Selecting the correct tape-in extension is crucial for fine hair. Not all tapes are created equal, and the wrong choice can lead to premature slippage or damage. Below is a comparison of common tape-in options to help you make an informed decision.
| Feature | Standard Tape-Ins | Ultra-Thin Tape-Ins | Pre-Bonded Extensions |
|---|---|---|---|
| Weight | Medium | Light | Heavy |
| Adhesive Strength | Strong | Medium | Very Strong |
| Suitability for Fine Hair | Moderate | High | Low |
| Lifespan | 6-8 Weeks | 4-6 Weeks | 8-12 Weeks |
| Best For | Normal Hair | Fine/Delicate Hair | Thick/Coarse Hair |
For fine hair, ultra-thin tape-ins are often the best choice because they are lighter and less likely to cause stress on the hair follicles. You can explore our Pre-Bonded and other extension types to find the perfect fit for your needs.
Key Takeaways
- Fine hair requires lighter, ultra-thin tape-in extensions to prevent damage and slippage.
- Always start with clean, product-free hair to ensure the adhesive bonds correctly.
- Section hair thinly during installation to create a flat, secure base for the tapes.
- Avoid overlapping tapes to prevent bulkiness and discomfort at the roots.
- Use sulfate-free products and gentle brushing techniques to maintain the integrity of the adhesive.
- Schedule professional adjustments every 6 to 8 weeks to keep the extensions secure and healthy.
- Premium quality hair extensions from trusted sources like Hair Extensions Europe ensure better longevity and safety.
Frequently Asked Questions
Can I install tape-in extensions on very fine hair myself?
While it is possible to install tape-ins at home, it is highly recommended to seek professional help for very fine hair. Fine hair is more delicate and requires precise placement to avoid damage. Professional installers have the expertise to ensure the tapes are placed correctly and securely.
How long do tape-in extensions last on fine hair?
On fine hair, tape-in extensions typically last between 4 to 6 weeks before needing to be moved up. This is shorter than the lifespan on thicker hair due to the natural oil production and hair growth rate. Regular maintenance is essential to prevent tangling and slippage.
Will tape-in extensions damage my fine hair?
When installed and removed correctly, tape-in extensions should not damage fine hair. Damage usually occurs from improper installation, such as placing tapes too close to the scalp or using too much adhesive. Using high-quality extensions and following proper aftercare guidelines minimizes the risk of damage.
What is the best shampoo for tape-in extensions?
The best shampoo for tape-in extensions is a sulfate-free, alcohol-free formula. Sulfates can break down the adhesive, causing the tapes to slip. Alcohol can dry out the hair and the adhesive. Look for products specifically designed for hair extensions to ensure longevity.
Can I swim with tape-in extensions?
Yes, you can swim with tape-in extensions, but you should take precautions. Chlorine and salt water can dry out the hair and weaken the adhesive. Rinse your hair with fresh water before and after swimming, and wear a swim cap if possible. Apply a leave-in conditioner to protect the hair from drying out.
How do I remove tape-in extensions at home?
To remove tape-in extensions at home, use a specialized tape-in remover solution. Apply the solution to the tape, wait for it to dissolve the adhesive, and then gently slide the tape off. Never pull or yank the tapes off, as this can cause significant hair breakage. For detailed instructions, visit our Customer Service page.
Ready to Enhance Your Look?
Transform your fine hair with the perfect set of tape-in extensions. Hair Extensions Europe offers premium quality, 100% natural hair extensions designed for durability and a natural look. Order before 15:00 for same-day dispatch and experience the difference of professional-grade extensions. Visit our Home Page to browse our full collection and find your perfect match today.